Archive | Before and After RSS feed for this section

Lunch Break

22 May

I firmly believe in stopping work and eating lunch. I need that time, sandwiched in the middle of the day (pun intended), for restoration.

I don’t take it for granted. I’ve had a year of lunches plucked from between classes, spent in the convenience store next door. I’ve had hundreds of lunches, stranded an hour’s commute from home, imagining what it would be like to sit on my porch like a cat, watching the birds flit by. I’ve spent lunches at my desk, letting my mind wander, wishing for a moment of company.

But lately, I’ve had some lovely, lazy summertime lunches, full of sunlight, fresh sandwiches, and iced tea. Something I try to do whenever I go home for lunch is improve something. Whether I work on a quilt or unload the dishwasher or simply sit at the window and clear the clutter in my mind, I need to carry a small accomplishment in my pocket as I face the remainder of the day.

Today, my small accomplishment was to take a photo. I’m always trying to figure out what my photographic style might be. I may never know, but I definitely won’t if I don’t go out take some photos.

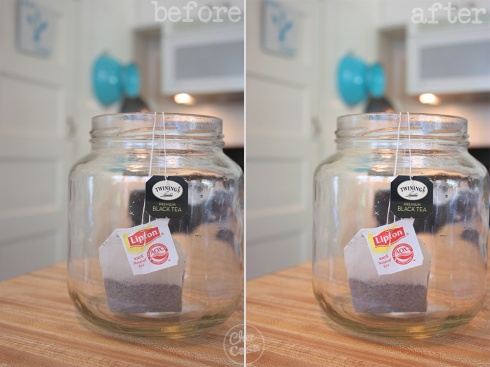
My subject was humble. Plain, even. But I wanted to capture a simple moment and see if it could tell a little story. As I was preparing a batch of honey mint iced tea, using my grandma’s old cherry jar, I found something to cherish. Because even though I have prettier tea vessels, none of those make me think of Grandma. Plus, in the background, you can just see the lovely turquoise colander my in-laws gave me and the cheerful “eat food” sign from a trip to East Hampton, MA on my pantry door.

Tea-time-before-and-after

There is very little difference between this before and the after. I tried to capture the light just as it was in the kitchen, so I only turned up the brightness and saturation a bit when I took it to Photoshop. I see so many photographers who do great, compelling work with low saturation. But I also love to see colors pop, while keeping a natural tone. Which do you prefer?

As a follow-up to this post, I’d like to add that I also fixed my vacuum cleaner during my lunch break, using pliers and a coat hanger. That, however, doesn’t quite make for an interesting blog entry.

Bathroom Window: Mini Before and After

1 May

When we moved into this house, it immediately felt homier than any other we’d shared. But it was also in need of the most work. As I think about it, that’s probably why I liked it immediately–it needed me and I needed it. I needed its high ceilings, its rooms full of uneven wood floors, its wall to wall windows in every room (26 in all!). It needed someone to scrape the gum off the floor, to paint over the scribbles on the walls, and tend to the overgrown brush in the yard.

One room in particular needed attention. No matter how much we loved the house when we moved in, Garrett and I were a little scared of that room–the hall bathroom. Everything was a different shade of white, from the three types of tiles, to the original bathtub, to the cheaply updated sink. Not to mention the trim and the walls and the wobbly toilet. It had something of an “abandoned sanitarium” vibe.

We ignored it for as long as we could, and even in the middle of the night, we’d happily take the extra steps to go to the second bathroom at the back of the house rather than risk the inevitable goblin attack in the hall bathroom three steps away. Eventually though, we took action. After weeks of fussing about what color would go with seven shades of white, I finally just grabbed a bucket of our leftover paint and took after it. (If you’re wondering, Valspar’s Filtered Shade isn’t so bad.) After adding that bit of color, the light bulb lit up and all sorts of colorful accessories were suddenly perfect for that space.

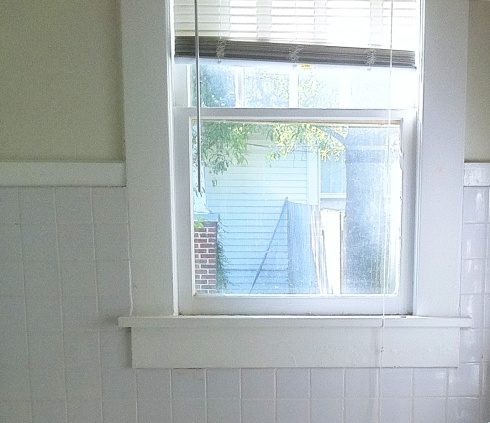
Until this week, though, the dilapidated mini-blinds were still hanging.  I was finally convinced of what to do about it when I saw this photo on Design*Sponge. The first photo connected the dots between that window and the chevron fabric I’d had in my cabinet for two years. After 45 minutes of measuring, sewing, and dusting, I had this:

Bathroom Window Shade

And it only took two years to get that from this:

Bathroom-Before1

(This is a cropped photo from my phone. Boo to me for not taking more before pictures of the house!)

There’s certainly more work to be done, but I’m happy to have this little project  completed. No goblins would dare live in such a cheery room!

Before and after: Behind the Scenes

23 Jan

Photoshop. It’s a tricky beast.

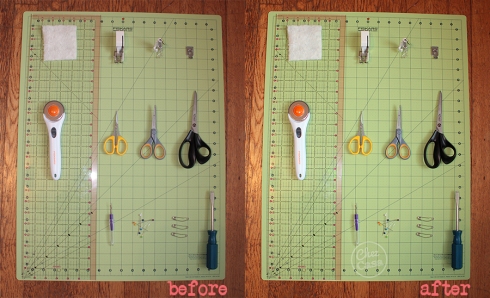
One of the reasons I love to blog is because it forces me to learn more about photography and Photoshop. But boy these guys are time-consuming. When I was prepping my quilting kit post, I tried three separate times to get a decent photo of my supplies. The first two times, I thought I had good photos until I looked them on my computer to find that the lighting was too weird, the items weren’t lined up quite right, or they were out of focus (my perpetual problem). I’m the type who likes to get photos right in-camera (as opposed to doing a lot of editing later), but they will never be so good that they won’t need a good clean-up.

Since every photo shoot has different subjects (people, landscapes, objects) and lighting situations (indoor, outdoor, shade, full sunlight, night), each set of photos you take will require different edits. Two great resources for me are the Clickin’ Moms blog and the Scott Kelby Photoshop books (I have this one).

Even with these resources and three photo sessions, I still struggled to get a decent final photo. I’m pleased with the final results (even though they aren’t perfect at all), and thought I’d share my process if it would help anyone out there.

The process is specific to a photo that:

  1. is indoors
  2. has good natural light that isn’t too harsh (not shining directly on the subject)
  3. is of objects, not people

photoshop-before-and-after-1s

This was done in Photoshop CS6 for Windows, so if you have an earlier version, things could be a little different for you.

The first thing I needed to do, was get rid of the glare from the flash on the ruler. This is a bit persnickety, because it requires you to merge parts of two photos (with and without flash) so it isn’t included here. I’m happy to add the process if anyone needs it, though!

Next, I had to  straighten the photo. To straighten:

  1. Right click on the eyedropper tool in your sidebar.
  2. A box of options should pop up. Click on the ruler tool.
  3. Draw a line across an area that should be straight, but isn’t.
  4. At the very top of the page, click “Image.”
  5. Go down to Image Rotation.
  6. Click Arbitrary.
  7. When the box pops up, click okay.  (A number will be pre-filled in the box, based on the line you drew earlier.)
  8. Your photo should be straight now, but if it still looks a little off, feel free to undo and try again!

Since parts of the image were a still a bit out of focus, I sharpened the image. To sharpen:

  1. Click “Filter” at the very top of the page.
  2. In the drop-down, click “Sharpen” and then “Unsharp Mask.”
  3. In the box that pops up, you have three settings you can adjust. Mine are set to: Amount: 60%, Radius: 3.5 pixels, Threshold: 3 levels. Make sure the Preview box is checked so you can see how this affects the photo.  I chose these settings because I’m sharpening objects that have a good amount of fine detail. [These settings would be really harsh on a photo of a person.]
  4. After you’ve adjusted the settings to your liking, click okay and the settings will be applied!

My original photo was a tad on the dark side, so I increased the brightness. To do this:

  1. Click “Layer” at the top of the page.
  2. In the drop-down menu, click “New Adjustment Layer” and select “Brightness/Contrast.”
  3. In the box that pops up, click “okay. “
  4. In the box that pops up, increase the brightness to suit your taste. Here, mine is set at 7.

The final step I took was to bring out the colors in the photo by

  1. Click “Layer” at the top of the page.
  2. In the drop-down menu, click “New Adjustment Layer” and select “Saturation.”
  3. In the box that pops up, just click “okay.”
  4. In the next box, increase the saturation to your taste. Mine is set at 13. You can go up to 25 or 30 in most photos without overdoing it.

A rocky start, a rocky middle, and a happy ending

28 Nov

Boy did I send a lot of time on this quilt. I received the fabric as a gift back in August and had the most trouble deciding what I wanted to do with it, pattern-wise. The fabric is Serenade by Kate Spain and I love it, but there is a lot going on–in color and design–and after I had the quilt top finished, I came to realize that I should have added some neutral color or some sashing (or both) to get the look I had intended. I was a little disappointed in my “creative vision,” so the project stalled. Fortunately, Garrett kept encouraging me to move forward. What a guy!


When I did get the motivation (and backing fabric) to move forward, I hit a snag with my machine. A literal one. I could not get the tension of the thread right. Not by guessing, not by Googling, not even by guessing some more! So, in a burst of inspiration, I found my sewing machine manual and consulted it. Now, I should say that I bought my sewing machine for $30 on Craigslist–and I’ve moved two or three times since–so I didn’t think I actually had the manual. Otherwise, yes, that might’ve been a good place to start. But here we are.

So I consulted the manual, figured out that the problem was simple, and fixed it. Unfortunately, I’d been sewing with the wrong tension for a long time without realizing it, and had to go back and fix a lot of shoddy workmanship. Bummer. In the end, I learned a lot about my machine (including the fact that it has a manual!) and I liked how quilt #2 turned out, so much that I gave it away. I wouldn’t give away something I didn’t like, or wasn’t proud of, and I was thrilled to give it to my cousin’s daughter on her first birthday. Technically, it was a late birthday present that I gave her on Thanksgiving, by putting it under my grandmother’s yet-to-to-be updated Halloween/Christmas tree, but that’s neither here nor there.

More photos to come later!

A Stitch in Time: Part II

16 Nov

My Flea Market Fancy quilt is finished and laying happily on my bed (it is not, at it appears here, laying folded up under a cat named George Foreman). So that’s awesome.

What’s even more awesome is that I’m on my way to finishing my second quilt. It sounds like I’m getting ahead of myself, but these two quilts are important. In all my years, I have never been able to settle on my Hobby. When people ask what I do in my free time, I never know what to say. I sleep recreationally? I like to imagine my next several meals? I attempt to see how much cleaning I can get machines to do for me? Those answers are lame. Because when people ask what your hobbies are, they’re really looking to learn, in a word or two, what kind of person you are.  A hobby doesn’t tell the whole story, but it opens the door to a person’s personality, if only a hair’s breadth.

So why is having quilting a a hobby so important to me? I’ve never been terribly good at staying with a hobby for very long. I’ve dabbled in photography, painting, calligraphy, garment sewing, and (my longest-term hobby) knitting. Allow me to insert this quote from the 30 Rock pilot to to capture how that went:

Jack: Sure. I got you. New York third-wave feminist, college educated, single and pretending to be happy about it, over scheduled, undersexed, you buy any magazine that says “healthy body image” on the cover, and every two years you take up knitting for… a week.

Liz: That knitting thing is uncanny. How do you do that?

Jack: Market research my friend.

All this to say, I have trouble with commitment. But quilting feels different. It captures so many things that I love and hope for in a hobby.

  1. It’s crafty
  2. It has clear steps to follow, but…
  3. It allows a lot of creativity
  4. It also allows for some mistakes
  5. You know when you’re finished
  6. There is a clear, tangible end-product
  7. There are always new skills to incorporate in the next project

And you know what? All of these things are true for those other lost hobbies I mentioned up there: photography, painting, knitting, and the like. The same is true for hobbies I don’t pursue: rock climbing, woodworking, music composition, and so on. The difference for me is that I embrace these traits for quilting in a way I haven’t done for other things. I embrace the process (in a way I couldn’t with knitting). I embrace the uncertainty (in a way I couldn’t with rock climbing). I embrace the next project (in a way I couldn’t with photography). And that, I think, is what makes a hobby work.

You’re just my type

11 Oct

Mod Podge Typewriter


Typically, typewriters and glue need to stay as far apart as possible. Unless your typewriter came out of Life magazine and your glue is Mod Podge, then you’re probably okay.

I was feeling the urge to create a couple of weeks ago and started rummaging through my house to find the right combination of what-nots to match the kind of craft I felt like making. I wanted to paint a little bit, I wanted to decoupage a bit, and I wanted something vintage-y. I can’t say I had a plan in mind.  Even now I’m not sure how it came together, but it came together fast. I just painted some sun-streaks on the canvas, then picked up my Exacto-knife (okay, it’s really just a box cutter) and went to town on the first intriguing picture I found in an old issue of Life magazine.

I remember that I really debated on whether to spend the dollar on the magazine, but in the end I’m glad I did. The only problem I’m having now is, is the picture finished? Do I need to add lettering, more pictures, or leave it simple?


Dr Rachel Reed

evidence-based birth information

Sigh For Love

chez: from the Latin "casa"

Art Gallery Fabrics - The Creative Blog

chez: from the Latin "casa"

Kitchen Table Quilting

chez: from the Latin "casa"

Bari J.

chez: from the Latin "casa"

The Waiting

Turns out, it's not the hardest part.

Karefully Made

Life. Love. Quilts.

My Blog

chez: from the Latin "casa"

Whipstitch

chez: from the Latin "casa"